Hiring a contractor can be a daunting and nerve-wracking task, and with good reason. If you select the wrong person, you could end up with a faulty roof, costing you a small fortune down the road. The following step-by-step guide provides you with useful tips to assist you in hiring a reliable roofing contractor.
The List
Selecting the right contractor is critical. Start by creating a list of contractors to consider, and keep these two key factors in mind:
- Location: A contractor’s base of operations will give you insight into how well the company will be able to work with you. If they’re too far away, travel costs may increase, whittling away at your budget unnecessarily. Additionally, their response time in the case of a sudden incident decreases due to the distance they’ll need to cover.
- Cost: While you won’t find a firm price at this stage, getting a rough estimate gives you a better idea of whether or not you can afford to hire a given contractor. If a contractor is too far out of your price range, it’s better to find that out now rather than towards the end of the exhaustive pre-screening process.

Pre-Screening Questions
After gathering a list of potential contractors, call each of them individually to interview them regarding their policies. Clarifying these points means you won’t have to ask them later when it might be too late.
While the questions you ask largely depend on the scope of the roofing project, there are general topics that should always be discussed at this stage in the hiring process:
The Business: Getting as much information about a contractor’s business gives you a good idea of how much experience they have and what services you can expect.
- Obtain a legal business name so you can establish that the company is legitimate.
- Ask where the business is located and how that might affect their ability to service you. Confirm their physical address.
- Request information regarding their contractor’s license, ensuring that they have the appropriate documentation in place.
- Request information on which individuals would be working on your roofing project and their experience, both within this company and any previous work they’ve done.
- Know what kind of insurance they have, as many states require this to be established before work can begin.
The Process: With so many different steps to the hiring process, it is important to be organized. Having appropriate questions will not only get you much-needed answers but make sure you are thinking over the different steps you’ll face.
- If you choose to pursue a candidate, they will need to come to your house to conduct an inspection to determine the needs of your project. This is critical, as this is the opportunity for both of you to get a first impression and decide whether there would be a good fit. Legitimate contractors will not charge you for this initial consultation.
- A job start date and an estimate of when the project would be finished gives you a solid timeframe to work within.
- Be sure to ask what might cause a deviation from these prices over the course of the project. Always be ready for the unexpected, arming yourself with an understanding of what will happen in a worst-case scenario.
- When you are required to pay the company and whether it will be fully paid upfront might affect which company you choose to hire.
The Necessities: You’ll most likely need to obtain a number of resources prior to and during the roofing work. It is most common that the contractors will acquire these resources, but it doesn't always happen that way, and you can negotiate to take over the elements that you would prefer to control.
- Inquire about any building permits required and if the contractor acquires it for you.
- Determine whether or not you’ll need to rent a dumpster for any materials being removed from the roof. Similarly, ask whether or not you’ll need to get a port-a-potty to have on-site if you’re uncomfortable with them using your in-home facilities.
- Ask if you’ll need to obtain anything to protect your driveway, lawn, or other outdoor assets.
- What steps are taken in the case of inclement weather?
- Whether or not you will need to establish additional ventilation to make sure that you and anyone else living in the home will be comfortable and able to breathe properly. This step is largely situational based on the extent of work being done and the layout of your home.
Feel free to include additional questions, particularly those specific to your home or the project itself.
Another detail you should establish once you have a good idea of whether or not this is a contractor you would like to pursue further is if there are any current work underway that you can see for yourself. This gives you an idea of what the process looks like first-hand, allowing you to imagine the set-up in your yard and see the team at-work, potentially those who will be taking on your roof ultimately.
Understand that while these questions are important to your selection process, many of them will require an inspection to occur in order for them to be fully answered.
The Inspection
Once you’ve begun to weed out contractors that are not a good fit for the job, it’s time to start bringing in candidates for an in-home inspection. This is one of the most important stages of the process, as it will give you a first-hand idea of how the company operates, the personnel involved, and the costs you will accrue.
This process is also important for the contractor. They want to know that you're serious about getting the job done, that you have a plan for how you'll pay for it, and they'll get an initial sense of what kind of client you will be.

Settle on a time for the contractor to visit. When they arrive at the house, have them walk around, both outside and in, to observe not just the roof and its needs, but the layout of the house so they know the space and the constraints they will be working within. Measurements will be taken, so make sure to provide them with as much access to the house as possible.
This is the time when contactors should identify any issues the roof or house may have. If there are any, the contractor should address those with you immediately, explaining what will need to happen to either solve or circumvent those problems.
If you know there is an issue with your roof, wait until the end of the visit to ask about it. This gives you time to see if the contractor notices it on their own, determining whether you can trust them and their observational skills. If they don’t recognize it, ask them anyway to see what their thoughts are about it.
Within a few days of the contractor's visit to your home, they should get in touch with a bid. The bid should include:
- The price and payment schedule
- The estimated start and end dates
- Warranty information

Comparing Quotes
You’ve narrowed your list down to a handful of candidates, but you can only hire one contractor. Comparing quotes can feel frustrating and unclear if you don’t know what information to look for:
- The kind of warranty policy each contractor holds may help form your opinion of each. Consider the length of the warranty, what damages/incidents are covered, to what extent they would be covered, and what additional costs might fall on you in a few years.
- Whether or not a company has workers’ compensation, liability insurance, or both can inform you on how well the company takes care of itself and how any harm that befalls the crew might delay the completion of your roof.
- If a company utilizes subcontractors, ask about the warranty, insurance, etc. for them as well.
- What steps are taken in the case of inclement weather?
- Search for reviews on the company online. Don’t let one or two disgruntled customers necessarily dissuade you, but the company’s history online should give you an idea of how well they’ve done in the past.
- Additionally, a couple of websites to peruse for more information are Better Business Bureau Reports and Angie’s List.
- What policies are in place for weather-related issues may be the aspect that tips the scales in favor of one contractor over the other.
- If they are on-call in case of a weather-based emergency that’s puts you or your home at risk.
- How a week of bad weather will affect the timetable of the assignment.
- Whether or not you’ve been able to obtain a written quote or estimate is an important factor when deciding if a contractor should be hired.
- Establishing if there will be someone on-site that acts as your point of contact with the team and company gives you an idea of how the group operates and how much control you’ll have over the situation at any given moment.
- Follow up with any provided references, as this may give insight into how well liked the contractor is and the quality of past work.
Talking to References
Ideally, you want to speak with individuals who have hired the contractors in the past. This may be easy depending on if they were recommended to you by a friend. Alternatively, you can ask the contractor for references. While this step may seem unnecessary, it will often give you more honest, blunt answers than you’ll find elsewhere.

- Start the conversation by asking whether or not they would hire the contractor again. If the answer is “no,” you’ve likely gotten all the information you need.
- Ask about any issues they’ve had with their roof since, whether they be leaks that occurred due to the work that had been done or outside influences that have caused damage to the roof. If there have been any, follow up by asking how the contractor responded to these issues, if at all.
- If they are comfortable with it, ask about whether or not the project was more or less than the estimated provided. If it was not, follow up with how much over budget it ended up being, as well as if they felt the costs were reasonable and necessary.
- Ask about what condition their home was left in. Was there any damage done to their flowers or lawn? Have they found leftover materials on their property since? Was there any undisposed debris left behind?
- Ask if there was someone on site who acts as a contact, and how well they did in this role.
- Check whether or not any permits were required before the roofing began.
Permits
As mentioned above, there may be paperwork that you’ll need to file prior to hiring a contractor and starting your roofing project, but, often, this isn’t the case. While this varies from location to location, it isn’t often necessary that you obtain one at all.
That being said, it is highly encouraged that you obtain a permit regardless of whether it’s required for a few reasons:
If a permit is not in place, a city inspector is within their legal rights to arrive on your premises and shut down the project at any point in time. This may seem extreme, but the possibility will be enough for some to not think twice before getting one.
Reroofing without a permit is a building code violation, meaning that this could nullify any warranties still attached to the house, thus devaluing the home as a whole.
Ultimately, the necessary permits are in place to protect you, any future owners of the home, and the city you live in.
On average, a permit will cost around $400 to obtain and involve between two and four inspections of the roof to get an idea of its current condition, what repairs are necessary, and what condition the roof is in after the work has been completed. This also ensures that your new roof will follow all of the building codes, preventing you from having issues down the road.
An important aspect to inquire about is whether or not getting the permit will be your responsibility or on the contractor’s. If the contractors take care of this, be sure to follow up with them before and after the job is done to confirm that the appropriate steps have been taken to protect you and your home.
Facilities and Materials
As was mentioned in Step 2, it’s important to know what facilities will be needed on-site and what you will be expected to provide.
The first thing to consider is how trash will be handled. Some contractors will come armed with their own disposal facilities, but this isn’t always the case. Make sure to ask, so you aren’t left with a pile of garbage sitting on your lawn. If they do not provide a dumpster, you will be able to rent one locally. Do the appropriate research on what companies are in the area and, once you have an idea of when you’ll need it, schedule a delivery date. You can also ask your contractor if they recommend a specific service.
Next, you’ll need to take into account where the building materials will be stored in-between working days. When the contractor team leaves for the day, will there be a pile of wood and tools sitting in the middle of your yard? How will these materials be protected in the case of inclement weather? The likelihood is, some form of tent or storage facility will be brought and set up on-site, but again, ask whether or not this responsibility will fall on your shoulders. If it does, check your garage, attic, shed, or anywhere else that might hold the materials in the interim.
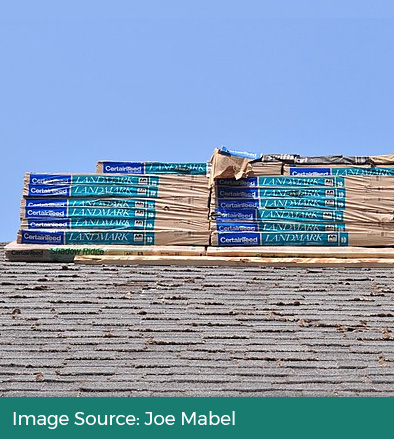
While on the subject of the materials, ask the contractor where they get theirs. This clues you in as to the quality of goods that will be used, the cost of them that will ultimately fall on you, and how far they will be traveling, which may inform when the work can start. If the salesperson gives any discounts when the necessary items are bought in bulk, that can save you a sizeable amount of money.
Some may wonder whether or not the contractors should be the ones to buy the materials, wanting to have control over the decision. Being able to select the goods on your own may sound like a good idea at first, but remember that you likely have no experience in the roofing business, putting you at a serious disadvantage when shopping. Additionally, the contractor will be accustomed to using certain materials or buying from a particular store, as they will do enough business to warrant being a regular customer at certain places. This rapport may provide them with some discounts outright, or potentially allow the materials to be delivered sooner than they would otherwise.
This doesn’t mean that this has to be entirely hands-off for you, though. Sit down with the contractor you hire and discuss what materials they intend to get and from where. If you have any issues or concerns, speak up, and any worthwhile contractor will be able to talk you through the process, either explaining why the decisions at-hand are wise or taking your concerns in stride and going in a different direction at your behest.

Quality Checks
Each roofing company should have a list of quality check steps in place for their customers. This is a list of steps that the contractors follow each day of construction, providing the homeowners with appropriate information over the course of the day and ensuring that all the construction stages are completed appropriately. While each contractor will have a different set of checks, here are a few stages that should be present on any quality checklist:
- Have the foreman knock on the door each day, either to introduce themselves or to inform the owners that construction is starting for the day.
- Prepare the ground space to protect the lawn or home features from any potential breakages or issues. Additionally, there should be procedures here for removing a satellite dish or any other additions present on the roof.
- All materials are accounted for and obtained from wherever they are being stored, placed at appropriate locations, both for safety and awareness purposes.
- Appropriate shingling procedures are being followed.
- Any additional components of that would be required for your specific roofing project, such as the installation of a skylight, should be handled.
- A detailed layout of their ventilation policy and what would be expected of you to keep the air in your house clean.
- End of the day clean up of the grounds, storing leftover materials, etc.
- Knocking on the door to inform the homeowners that construction has concluded for the day.

Payment
As mentioned in Step 2, you should have a payment plan laid out for when the work has concluded. Once the final inspections are completed, and you’ve been given the go-ahead, submit the final payment as agreed upon.
Payments will commonly occur in stages, as agreed upon in your contract. It is common to pay a portion of the fees up-front and the remainder upon completion. For particularly complex jobs you may want to pay in more stages, when particular tasks are completed.
If you are submitting an insurance claim for the work, make sure that all the appropriate documents have been submitted before concluding business, as this protects you from any issues you may face.
Some contractors will require a full payment up-front. This doesn’t always mean that there will be an issue in the long-term, but be careful. Paying in full up-front can be nerve-wracking for you and demotivate the contractor from doing a good job, as they already have all the money they presumably are going to get.
Disputes
Over the course of the process, you may encounter a situation where something done on-site violates the contract, or where something covered in the contract is not being completed. If this is the case, bring your issues up with the foreman. Be sure to have a secondary copy of the contract that you can reference and talk the foreman through, if necessary.

If peaceful discussion does not resolve your issues appropriately, you may need to bring the contractor to court. This should be your last option and shouldn’t be done lightly, as it can cost you a lot more money down the road, as well as cause bad blood between you and the contractor in question.